WhatsApp click to chat button for your website
Use Javascript and HTML to add a WhatsApp click to chat button and use your website to start conversations with your customers.
Use the following code to use the WhatsApp click to chat URL to add a button on your website, this will allow your visitors to easily start conversations with your WhatsApp Business account.
What you can get
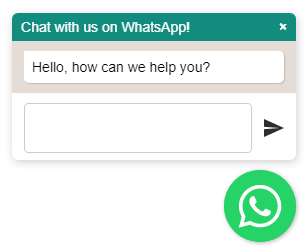
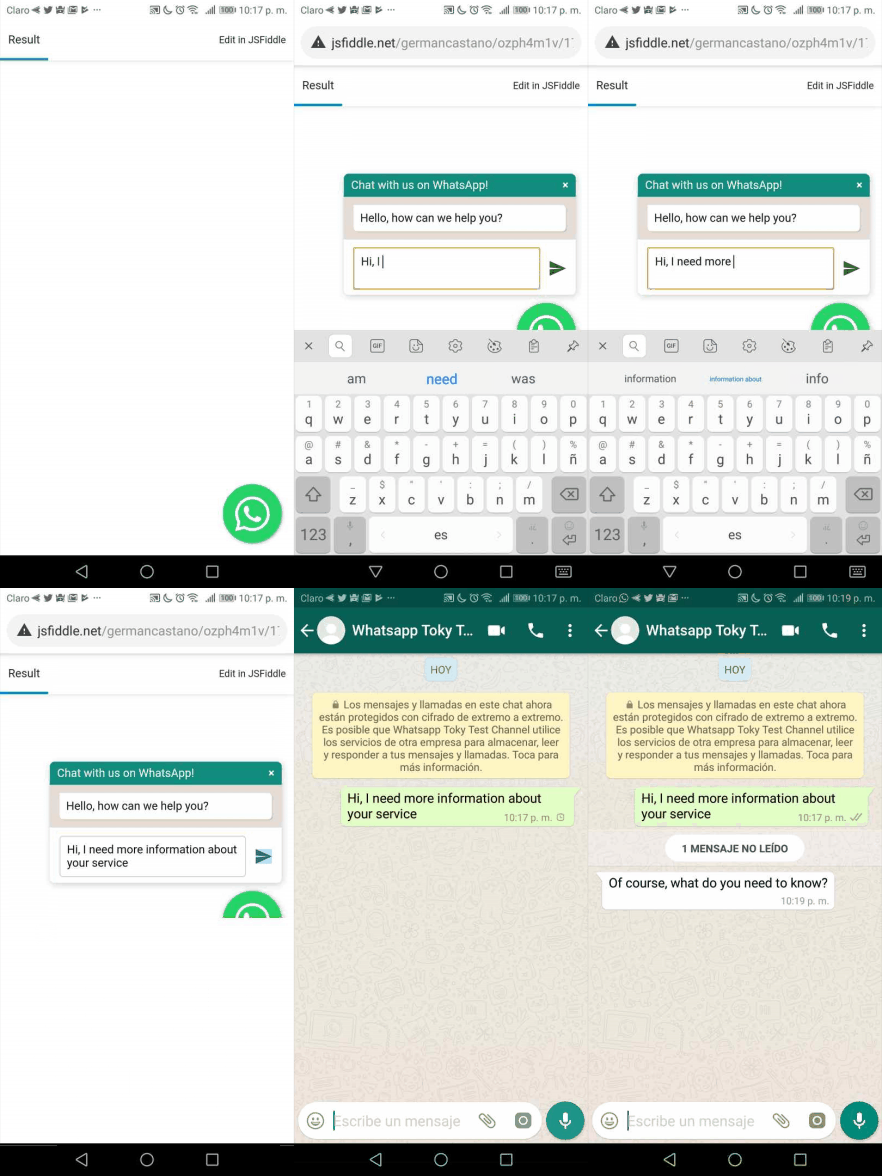
You can add an attractive floating WhatsApp click to chat button to your site. This button will start the conversation with WhatsApp web, if it is run from a desktop computer, or the WhatsApp app if used from a mobile device.

WhatsApp Click to chat button
If a mobile user use the button will start a conversation through WhatsApp for iOS or Android.

WhatsApp Click to chat button Android iOS
Resources
To create this click to chat button, we will use:
- Jquery
- Floating WhatsApp plugin: A JQuery plugin, created by Rafael Botazini, this code creates a floating button that will start the conversation with WhatsApp web, if it is run from a desktop computer, or the WhatsApp app if used from a mobile device. You will need to download: floating-wpp.min.css, floating-wpp.min.js, and whatsapp.svg.
- WhatsApp Business phone number: This number will be used by the plugin to run the WhatsApp Chat link.
This code uses open source components and they are not official WhatsApp or Toky products so they are provided as useful resources but we don't offer any support on its implementation.
Installing the Click to Chat button
We start by adding the libraries and CSS to the header of your website:
<!--JQuery-->
<script type="text/javascript" src="jquery-3.3.1.min.js"></script>
<!--Floating WhatsApp css-->
<link rel="stylesheet" href="floating-wpp.min.css">
<!--Floating WhatsApp javascript-->
<script type="text/javascript" src="floating-wpp.min.js"></script>
Now you must add a div with the WAButton ID, which is where the plugin will render the click to chat button.
<!--Div where the WhatsApp will be rendered-->
<div id="WAButton"></div>
You must add a script block where the plugin is used on the div that we added in the previous step:
<script type="text/javascript">
   $(function () {
           $('#WAButton').floatingWhatsApp({
               phone: 'WHATSAPP-PHONE-NUMBER', //WhatsApp Business phone number
               headerTitle: 'Chat with us on WhatsApp!', //Popup Title
               popupMessage: 'Hello, how can we help you?', //Popup Message
               showPopup: true, //Enables popup display
               buttonImage: '<img src="whatsapp.svg" />', //Button Image
               //headerColor: 'crimson', //Custom header color
               //backgroundColor: 'crimson', //Custom background button color
               position: "right" //Position: left | right

           });
       });
</script>
This code has the following basic parameters:
- phone: Phone number you use for WhatsApp Business.
- position: Define if you want the button to appear to the "left" or to the "right".
- popupMessage: The message that will appear in the popup window, inviting the visitor to start a conversation.
- showPopup: Define if the message popup window is enabled or disabled. If disabled, only the button appears, and clicking on it will start the conversation.
- autoOpenTimeout: Number of milliseconds that the plugin must wait to open the popup automatically.
- headerColor: Background color of the popup window’s title bar.
- headerTitle: The popup window’s title
- buttonImage: Image that you want to appear in a
<img>tag. - size: Button width in CSS format, default is “72px”.
- backgroundColor: Background color for the floating button
Updated 8 months ago
